“You Are” card with hot foil
Hi Krafty friends, this card was made using Pinkfresh Studio as well as Altenew products. I have been having the Altenew stamp set for a while and used it a handful of times. The Pinkfresh Studio items are from their Folk Garden 2 collection and were new for me, but aren’t super new in their line of products.
Step 1: Hot foiling the background
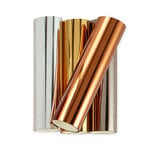
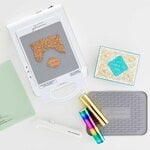
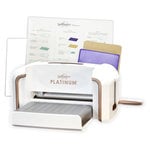
On Hammermill paper, I hot foiled some Spellbinders heat foil in bright gold using the Hot Foil Plate from Pinkfresh Studio’s Folk Garden 2 collection. I used my Spellbinders hot foiling machine along with my Spellbinders Platinum 6 machine for the needed pressure.
Step 2: Coloring and cutting the flowers
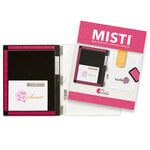
To color the flowers after foiling the image, I used the coordinating layering stencils along with Catherine Pooler Inks and some blending brushes. The stencils were simple to use and created some beautiful flowers! I also used my Misti and Sticky Mat from Scrapbook.com to help with lining up the stencils easily along the edge of my Misti.
Next, I cut the flowers out once using the coordinating die along with my Spellbinders Platinum 6 machine.
Step 3: Creating the Sentiment
I didn’t want a huge sentiment as to not distract from the beautiful flowers. So, I pulled from my stash Altenew’s Circled Sentiments stamp set and matching dies. I stamped out the “You Are…” sentiment from the set in black ink. Then cut it out using the circle die. I wanted a little soft filter behind the sentiment so, I cut a piece of vellum out using another circle die I had on hand.
Step 4: Putting it all together
So, putting it all together was the hardest part of this card. First I did some ink blending around the edges of the kraft colored card base in some brown ink. Then I arranged the cut flowers how I liked them on the front of the card in way I thought they looked good and used most of the flowers. To keep them in place I placed a piece of Glad Press and Seal over the top to hold the pieces in place like I liked then flipped it over to add adhesive to the back. I use some foam backed adhesive strips and dots to give them dimension. Then placed some glue in some areas on top the foam to give me time to move the flowers around on the card base if needed. Once the glue was dried I removed the press and seal. For the pieces of flowers that were hanging over the edges of the card front I trimmed them off with some scissors.
Next, I glued the sentiment on top of the vellum circle. Then glued the circles on top of the flowers in the center of the card! I loved how the simple sentiment doesn’t distract from the flowers that are cut out and have dimension!
So, there it is! The step-by-step process for this beautiful card with a versatile sentiment. You can later stamp on the inside whatever you want to depending what you want to say to whomever you’re sending it to! I love how adding foam tape to the flowers gave them dimension and helped them stand out even more! I also love this Folk Garden 2 coordinating set by Pinkfresh Studio. I hope you guys like this card, and that it gives you some inspiration for some die cut flowers you may have in your stash. Have you tried creating a card similar to this one? If so, let me know in the comments how it came out and what products you used. Also, feel free to contact me if you have any questions about how I made this card or the supplies I used.
Your Krafty Friend,
Tiffani
- Folk Garden 2 Die - Pinkfresh Studio - November 2021

- Price: $17.84
- Pinkfresh Studio - Layering Stencils - Folk Garden 2

- Price: $17.07
- Pinkfresh Studio - Dies - Folk Garden 2

- Price: $18.87
- Circled Sentiments Stamp & Die Bundle

- Price: $25.99
- Circled Sentiments Stamp Set

- Price: $21.00
- Circled Sentiments Die Set

- Price: $4.99
- Circled Sentiments Inspiration Guide

- Price: $5.99
- Spellbinders - Glimmer Hot Foil System, NEW

- Price: $99.99
- Beach Retreat Mini Ink Pads - Catherine Pooler - Ink

- Price: $39.95
- Luxe Mini Ink Pads - Catherine Pooler - Ink

- Price: $39.95
- Apothecary Mini Ink Pads - Catherine Pooler - Ink

- Price: $39.95


