YES, you can heat emboss on Yupo!

Hey Krafty friends! I was drawn to create this card because I won this stamp set, along with a few others, from Momenta via an Instagram post they put out! I was so happy to get them. This stamps pattern with blue and white made me think of old pottery, so that was my inspiration. I also wanted to experiment heat embossing a big image on Yupo paper to see if it would work out…eek!
Step 1: Creating the main panel
I knew I wanted that shiny look of Yupo paper with various colors of blue ink. So, I pulled out a sheet of Tim Holtz Yupo paper and 3 colors of Tim Holtz alcohol ink (Indigo, Sailboat Blue, and Tranquil Pearl Ink), as well as the Alcohol Blending Solution by Tim Holtz. I played with adding more and more of the various colors and blending solution and using my Tim Holtz hand held air blower/pump to move the ink around until I was happy with the look! I new I wanted the whole panel to be covered with blue ink because I wanted to stamp the image in white.
Step 2: Stamping and heat embossing
The hardest part was getting the image dry, as I was being impatient and didn’t want to wait on it. So, I used my light heat Tim Holtz heat gun to dry the panel as I didn’t want to melt or warp the Yupo paper. After it was dry, I rubbed my powder tool across my panel in case there were any spots that weren’t totally dry because I only wanted the embossing powder to stick on the stamped image. Then I place my panel on my Mini Misti using my sticky matt so I didn’t have to use a magnet since the stamp covered the whole piece of paper! Then I conditioned my Momenta stamp, because it was the first time I used it, and I wanted it to stamp well. And next I stamped my image using VersaMark ink and poured the white embossing powder on top. I did the best I could brushing off any stray bits of embossing powder that were places it shouldn’t be, before heat embossing. When heat embossing with my Wagner heat gun, I took my time embossing one small area at a time with not too much heat as I didn’t want to melt the paper or warp it too bad! I then used a rectangle die from my stash that cuts embossed edges to give the panel a clean look.
Step 3: Creating the sentiment
I knew I didn’t want a big sentiment as I didn’t want to cover the beautiful embossed image, so I looked for a small sentiment I could stamp and heat emboss in white. I ended up using a sentiment from Altenew’s Beautiful Insides stamp set. I struggled with deciding on what color cardstock to stamp on or if I should use velum, so I stamped a few different ones out before I decided on what to use! I ended up stamping the sentiment on velum in white embossing powder and placing a small piece of dark blue cardstock I had in my stash just behind the stamped sentiment part of the velum. This way, the sentiment wouldn’t get lost in the stamped background.
Step 4: Putting it all together
I cut the piece of velum long enough to wrap around the back of the panel and glued the ends to the back so that you wouldn’t see any glue on the ends of the velum on the front. I also put foam squares behind the blue cardstock piece of the sentiment for some dimension. That way you couldn’t see the foam squares! I then placed some foam strips on the back of the whole panel which help the little warping that I got from heat embossing. Then I placed the panel onto my A2 sized white card base that I cut from a sheet of 110 lb Neenah Classic Crest Solar White cardstock. And it was done!
This was my process for completing my card! It came out great and I’m glad I experimented with heat embossing on Yupo paper! I will probably use this technique more in the future as it was fun to do! I think the key is taking time when using your heat gun to not let the heat stay on the paper for too long in one spot and heating small areas at a time. Let me know if you try this technique and how it works out for you! Also, let me know if you have any questions about how I made this card or any of the products I used.
If you’d like to see a video of how I created this card visit my YouTube channel!
Your Krafty Friend,
Tiffani
- Altenew - Clear Photopolymer Stamps - Beautiful Inside

- Merchant:Scrapbook.com
- Price: $20.47
- Ranger Ink - Tim Holtz - Alcohol Ink Yupo Paper - 5 x 7 - 10 Pack
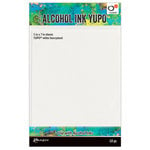
- Merchant:Scrapbook.com
- Price: $16.14
- Ranger Ink - Tim Holtz - Alcohol Ink Yupo Paper - White - 10 Pack
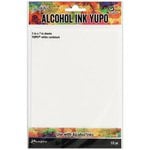
- Merchant:Scrapbook.com
- Price: $12.34
- Tim Holtz Alcohol Ink White Yupo Paper 86lb - Ranger - Alcohol Ink - Tim Holtz

- Merchant:A Cherry On Top
- Price: $12.34
- Tim Holtz Alcohol Ink White Yupo Paper 144lb - Ranger - Alcohol Ink - Tim Holtz

- Merchant:A Cherry On Top
- Price: $14.24
- Ranger Ink - Tim Holtz - Alcohol Ink - Air Blower
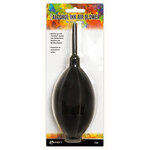
- Merchant:Scrapbook.com
- Price: $11.39
- Tim Holtz Alcohol Ink Air Blower - Ranger - Alcohol Ink - Tim Holtz

- Merchant:A Cherry On Top
- Price: $9.44
- Ranger Ink - Tim Holtz - Alcohol Blending Solution - 2 Oz
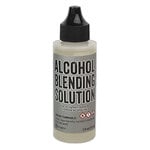
- Merchant:Scrapbook.com
- Price: $6.64
- Tim Holtz Alcohol Ink Blending Solution - Ranger - Alcohol Ink - Tim Holtz

- Merchant:A Cherry On Top
- Price: $6.29
- Indigo - Adirondack Lights Alcohol Ink - Ranger - Alcohol Ink

- Merchant:A Cherry On Top
- Price: $3.99
- Sailboat Blue - Adirondack Brights Alcohol Ink - Ranger - Alcohol Ink

- Merchant:A Cherry On Top
- Price: $3.99
- Tranquil Tim Holtz Alcohol Pearls - Ranger - Alcohol Ink - Tim Holtz

- Merchant:A Cherry On Top
- Price: $3.74
- Tim Holtz Alcohol Ink - Indigo
- Merchant:Joggles.com, Inc
- Price: $2.99
- Tim Holtz Alcohol Ink - Sailboat Blue
- Merchant:Joggles.com, Inc
- Price: $2.99
- Ranger Ink - Tim Holtz - Alcohol Inks - Pearl - Tranquil

- Merchant:Scrapbook.com
- Price: $4.74
- VersaMark Watermark Stamp Pad - Tsukineko - VersaMark

- Merchant:A Cherry On Top
- Price: $8.99
- VersaMark Watermark Stamp Pad - Small Cube
- Merchant:Scrapbook.com
- Price: $2.33
- Ranger Ink - Basics Embossing Powder - Super Fine - White
- Merchant:Scrapbook.com
- Price: $5.69
- White Embossing Powder - Ranger - Embossing Powder

- Merchant:A Cherry On Top
- Price: $4.99
- Ranger Ink - Inkssentials - Heat It Craft Tool

- Merchant:Scrapbook.com
- Price: $28.49
- Ranger Heat It Craft Tool
- Merchant:Joggles.com, Inc
- Price: $25.49
- Spellbinders Platinum 6.0 Cut & Emboss Machine - Spellbinders

- Merchant:A Cherry On Top
- Price: $119.99
- Spellbinders - Platinum 6 - Die Cutting and Embossing Machine

- Merchant:Scrapbook.com
- Price: $101.99