August 2022 Challenge Entry
Hey Krafty friends! I love Altenew products, so I often look at their monthly inspiration challenges. I would love to win one of their challenges one day, so I finally decided to try! I wanted to still make a birthday card like in the challenge’s example card, but use a different image. Something out of the many Altenew stamps and dies that I own. So, I came up with the card below.
Step 1: Creating the main panel
I cut an A2 sized panel out of kraft colored card stock and placed it inside my Misti to stamp my image. I stamped the flower in the middle using Altenew’s Whimsical Tulip stamp set with VersaMark ink then placed Brutus Monroe’s White embossing powder on top and heat set. Then I stamped the flowers on the sides in VersaMark ink and let dry. I then decided I wanted to use the little dots from the stamp set as if something was coming from the flowers. So, I stamped the ones I wanted to heat emboss in white first and heat embossed them. Then I stamped the ones I wanted to leave with the watermark look next with VersaMark without any embossing powder. Next, I colored my heat embossed flower with Faber Castell Polychromos colored pencils in the colors Pink Madder Lake, Madder and Burnt Siena. I also added some pink dots above the colored flower with the colored pencil.
Step 2: Creating the sentiment
I die cut the work HAPPY out of Altenew’s Mega Greetings 2 die set three times. Twice on white cardstock and once on black. I took one of the white die cuts and covered with VersaMark ink and added Altenew’s Golden Peach embossing powder on top and heat embossed it. I then stacked the three words on top of each other slightly offset for a shadow look. First the black, then the white, then the golden peach heat embossed one. Next I stamped and heat embossed several combinations of black, white and pink cardstock with various colors of embossing powder and decided that the black cardstock with the Golden Peach embossing powder looked the best.
Step 3: Putting the card together
First I cut the kraft background down evenly on all sides enough to give leave 1/4th of a border of the white card base exposed. Then I glued the background down with liquid glue. Next I glued down the HAPPY die cut slanted across my card. Then cut the edges of the word that was hanging off the card base with scissors. Lastly, I place the BIRTHDAY sentiment strip across the HAPPY die cut using foam squares for some dimension. Then I called the card done.
Note: I also stamped the flap of the envelope in VersaMark ink using the same stamp set!
I sooooo love this card and how it came it. I think it’s so sophisticated looking and I love the colors together! Let me know what you think about this card and if you would have done anything different. And please let me know if you have any questions about how I made this card or any of the products I used.
Your Krafty Friend,
Tiffani
- Golden Peach Crisp Embossing Powder

- Merchant:Altenew
- Price: $7.00
- Mega Greetings Stamp & Die Bundle

- Merchant:Altenew
- Price: $51.00
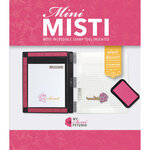
- Mini MISTI - Most Incredible Stamp Tool Invented

- Merchant:Scrapbook.com
- Price: $49.99
- My Sweet Petunia MISTI - Mini

- Merchant:Altenew
- Price: $45.00
- Solar White (MSRP per sheet $.16) - Neenah 80lb Classic Crest Cardstock 8.5"X11" 250/Pkg - Neenah Paper

- Merchant:A Cherry On Top
- Price: $44.99
- Solar White Neenah 110lb Classic Crest Cardstock 8.5"X11" - Neenah Paper

- Merchant:A Cherry On Top
- Price: $37.49
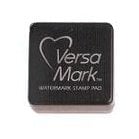
- VersaMark Watermark Stamp Pad - Small Cube

- Merchant:Scrapbook.com
- Price: $2.33
- VersaMark Watermark Stamp Pad - Tsukineko - VersaMark

- Merchant:A Cherry On Top
- Price: $8.99
- Whimsical Tulip Stamp & Die Bundle

- Merchant:Altenew
- Price: $11.00
- Whimsical Tulip Stamp Set

- Merchant:Altenew
- Price: $5.00
- Faber-Castell Polychromos Pencil Set - Assorted Colors, Set of 12

- Merchant:Blick Art Materials
- Price: $19.20
- Faber-Castell Polychromos Pencil Set - Assorted Colors, Tin Box, Set of 36

- Merchant:Blick Art Materials
- Price: $57.49
- Faber-Castell Polychromos Pencil Set - Assorted Colors, Tin Box, Set of 60

- Merchant:Blick Art Materials
- Price: $95.97
- Tonic Studios - Tim Holtz - Non-Stick Micro Serrated Scissors - 9.5 Inch Titanium Shears

- Merchant:Scrapbook.com
- Price: $20.42

